Upgrade Your Space with a Recessed Spotlight Ceiling Kit
The desire to refine and enhance living and working environments is a constant. Among the many elements that contribute to a space’s atmosphere and functionality, lighting plays a pivotal role. Traditional lighting fixtures, while sometimes offering aesthetic appeal, can also create visual clutter and uneven light distribution. A modern solution gaining traction is the recessed spotlight ceiling kit, a system designed to provide integrated, efficient, and adaptable illumination. This approach moves away from protruding fixtures, embedding light sources directly into the ceiling for a cleaner, more contemporary look and a more purposeful light output.
Understanding the Recessed Spotlight Concept
At its core, a recessed spotlight Zeveau ceiling kit is a collection of components that work in concert to create a sophisticated lighting scheme. Unlike standalone ceiling lights, these kits are designed for seamless integration. The term “recessed” refers to the fixture’s ability to sit flush with the ceiling surface, concealing most of the housing and wiring. This creates an unobtrusive visual profile, allowing the light itself to become the primary focus, rather than the luminaire.
The Core Components of a Kit
A typical recessed spotlight ceiling kit will include several essential elements, each contributing to the overall functionality and ease of installation.
Spotlights (or Downlights)
These are the primary light-emitting devices. They are designed to direct light downwards, often with a degree of adjustability to allow for targeted illumination. The type of bulb or LED module used within the spotlight is a critical factor in determining light quality, brightness (lumens), and color temperature.
Trim and Housing
The housing is the part of the fixture that sits within the ceiling cavity. It protects the electrical components and provides structural support. The trim is the visible ring or bezel that surrounds the light source and often helps to mask the opening in the ceiling. Trims come in various styles and finishes to complement different interior designs.
Junction Box and Wiring Connectors
These components are crucial for safe and compliant electrical connections. The junction box provides a protected enclosure for wiring splices, and connectors ensure secure and insulated attachments between the spotlight and the main power supply.
Brackets and Mounting Hardware
Depending on the type of ceiling and the kit’s design, specific brackets and hardware will be included to secure the fixtures to ceiling joists or other structural elements.
The Advantages of a Recessed Spotlight System
The move to recessed spotlights offers a range of practical and aesthetic benefits that contribute to a more refined and functional space.
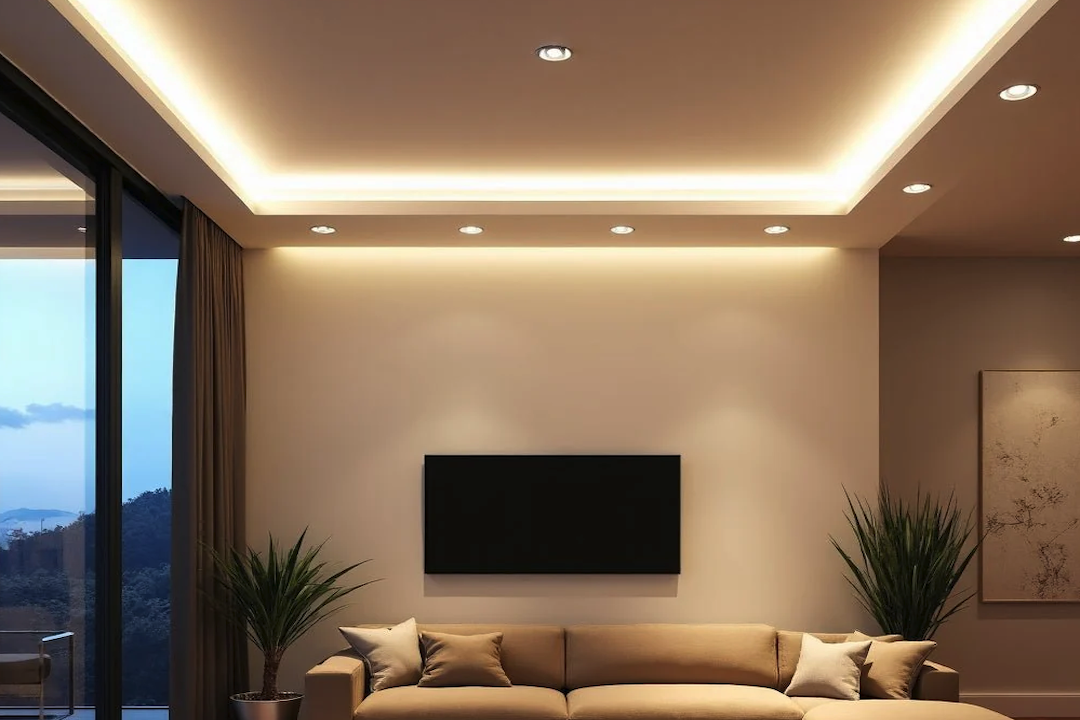
Enhanced Aesthetics and Visual Cleanliness
One of the most immediate benefits of a recessed spotlight ceiling kit is its contribution to a cleaner, more minimalist aesthetic. By eliminating hanging or surface-mounted fixtures, these systems reduce visual clutter.
Creating an Uncluttered Ceiling Plane
The ability to integrate light sources directly into the ceiling means that the ceiling surface remains largely uninterrupted. This can make a room feel larger and more open, as the eye is not drawn to protruding objects.
Versatility in Design Integration
The discreet nature of recessed spotlights allows them to blend seamlessly with a wide variety of interior design styles, from minimalist modern to more traditional schemes. The focus shifts to the quality and placement of light, rather than the fixtures themselves.
Improved Light Distribution and Control
Recessed spotlights offer greater control over how light is distributed, enabling more targeted and effective illumination.
Avoiding Hotspots and Shadows
Properly spaced and aimed recessed spotlights can provide a more even and consistent light across a room, mitigating the formation of harsh hotspots and deep shadows that can occur with less dispersed lighting.
Directional Lighting Capabilities
Many recessed spotlights are adjustable, allowing users to aim light precisely where it’s needed. This is particularly useful for highlighting specific architectural features, artwork, or task areas.
Increased Energy Efficiency and Longevity
Modern recessed spotlight kits often utilize LED technology, which offers significant advantages in terms of energy consumption and lifespan.
Lower Energy Consumption with LEDs
LEDs consume considerably less energy than traditional incandescent or halogen bulbs for the same light output. This translates into lower electricity bills over time.
Extended Lifespan of LED Components
LEDs have a much longer operational life compared to older lighting technologies. This reduces the frequency of bulb replacements, saving both money and effort.
Planning and Installation Considerations
While the benefits are clear, successful implementation of a recessed spotlight ceiling kit requires careful planning and execution.
Assessing Your Lighting Needs
Before purchasing a kit, it’s crucial to understand the specific lighting requirements of the space.
Determining Area Illumination Levels (Foot-candles or Lux)
Different areas and activities require varying levels of light. For example, a kitchen workspace will need higher illumination than a bedroom reading nook. Researching recommended foot-candle or lux levels for specific areas can guide the number and type of fixtures needed.
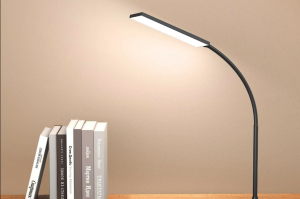
Identifying Task and Accent Lighting Requirements
Beyond general ambient light, consider where task lighting (e.g., for cooking or reading) and accent lighting (e.g., for artwork) will be most beneficial. Recessed spotlights are well-suited for both.
Ceiling Structure and Clearance
The existing ceiling structure will influence the feasibility and type of recessed lighting that can be installed.
Understanding Joist Spacing and Obstructions
Identifying the location of ceiling joists is essential for mounting the light fixtures. Obstructions such as HVAC ducts, plumbing, or existing wiring can complicate placement and may require alternative mounting solutions or fixture types.
Ensuring Adequate Ceiling Cavity Depth
Recessed fixtures require a certain amount of space within the ceiling to house the fixture itself and any associated wiring. Ensure there is sufficient clearance to accommodate the chosen spotlight.
Electrical Load and Circuit Capacity
It’s important to ensure that the existing electrical system can handle the additional load of the new lighting.
Calculating Total Wattage or Amperage
Summing the wattage of all planned fixtures will give an indication of the total electrical draw. This should be compared against the capacity of the relevant electrical circuit.
Consulting an Electrician for Complex Installations
For larger installations or if there are any doubts about electrical capacity, consulting a qualified electrician is highly recommended to ensure compliance with building codes and safe operation.
Types of Recessed Spotlight Ceiling Kits
The market offers a variety of recessed spotlight kits, each with different features and applications.
Fixed vs. Gimbal (Adjustable) Spotlights
The primary distinction often lies in the adjustability of the light source.
Fixed Spotlights
These fixtures are designed to project light directly downwards from a fixed position. They are ideal for general ambient lighting or when a consistent light pattern is desired.
Gimbal Spotlights
Gimbal spotlights allow the bulb or LED module to be tilted and swiveled within the housing. This provides flexibility in directing light precisely where it’s needed, making them excellent for accent lighting and highlighting specific features.
Bulb Type and Light Quality
The choice of bulb or LED module significantly impacts the light’s appearance and efficiency.
Halogen vs. LED Options
While halogen bulbs were historically common, LED technology has largely surpassed them in terms of energy efficiency, lifespan, and color rendering capabilities.
Color Temperature (Kelvin) and Brightness (Lumens)
Color temperature, measured in Kelvin (K), determines the warmth or coolness of the light (e.g., warm white around 2700K, cool white around 4000K, daylight around 5000K). Lumens indicate the brightness of the light output. Selecting the appropriate color temperature and lumen output is crucial for creating the desired ambiance.
Smart Lighting Integration
Many modern kits are designed to be compatible with smart home systems.
Wi-Fi and Bluetooth Enabled Fixtures
These spotlights can be controlled remotely via smartphones or tablets, allowing for dimming, color changes (in some models), and scheduling.
Compatibility with Voice Assistants
Integration with popular voice assistants like Amazon Alexa or Google Assistant provides hands-free control of the lighting system.
Installation Process: A Step-by-Step Overview
While professional installation is often advisable, a basic understanding of the process can be helpful for homeowners undertaking a DIY project.
Preparing the Ceiling Area
This initial stage involves marking out fixture locations and ensuring clear access.
Measuring and Marking Layout
Careful measurement is critical to ensure even spacing and proper alignment of the fixtures. Using a stud finder and level is essential.
Cutting Ceiling Openings
Once locations are marked, precise openings must be cut in the drywall or ceiling material. The size of these openings will be determined by the trim size of the spotlights.
Wiring and Connecting the Fixtures
This is the most critical stage, requiring attention to electrical safety.
Running Wiring Between Fixture Locations
Electrical wire is run through the ceiling cavity, typically from a power source (e.g., a junction box) to each spotlight location.
Making Electrical Connections
Each spotlight’s wiring is connected to the main power supply using appropriate connectors and adhering to local electrical codes. This usually involves connecting the live, neutral, and ground wires.
Installing the Housings and Trims
The final physical steps involve securing the fixtures and completing the visible assembly.
Securing the Spotlight Housings
The housings are typically attached to ceiling joists or integrated into pre-constructed frames, providing a stable mounting point.
Attaching the Trims and Installing Bulbs
The visible trims are then secured to the housings, and any bulbs or LED modules are installed.
Maintaining and Upgrading Your Recessed Lighting
Once installed, recessed spotlight systems require minimal maintenance but can also be adapted to future needs.
Periodic Cleaning and Bulb Replacement
While LED bulbs have long lifespans, occasional cleaning of the trims and lenses can improve light quality.
Cleaning Luminaire Surfaces
Dust and grime can accumulate on trims and lenses, slightly dimming the light output. Gentle cleaning with a soft cloth is usually sufficient.
Replacing LED Modules (If Applicable)
In some integrated LED systems, the entire module may need replacement if it fails. However, with standard LED bulbs, replacement is straightforward.
Potential Upgrades and Enhancements
As technology advances or your needs change, your recessed lighting system can be adapted.
Swapping Bulbs for Different Color Temperatures or Brightness
This is a simple upgrade that can significantly alter a room’s ambiance without replacing the entire fixture.
Incorporating Smart Dimmers or Controls
If the initial installation didn’t include smart features, compatible smart dimmers or control modules can often be added to existing circuits.